Thursday, December 31, 2009

Pumpkins are not just for Jack-o-Lanterns

I belong to several food groups and recipe sites and everyday, I go through hundreds of e-mails and recipes, always looking for something new.  This morning, I was checking through the posts on
cocinacubanaintheexile@yahoogroups.com which is a wonderful group of people that I have become friends with.  They always have such great recipes as well as wonderful commentary on their Yahoo group.

On of the members posted a recipe for Pumpkin Soup and for some reason, that just sounded wonderful. One of the reasons could be, that it is freezing and quite snowy here in upstate New York.  I had some cans of pumpkin puree in the pantry that was leftover from Thanksgiving, so I thought, why not???

I followed the directions as they were given except that I added a little more to the exact amounts. The recipe called for 1 large can of pumpkin, but I used 3 (14 ounce cans). I also used 1 (48 ounce) can of College Inn Chicken Broth.  I also added some garlic salt when I was seasoning the soup.  I am going to give you the recipe exactly as it was posted and then, I have retyped it with my changes.  I'm so sorry I didn't get a chance to photograph this today, but I will definitely make it again, and try to do a step by step the next time.  I just wanted to get it posted as it was quite good.  I will say that the directions say season with salt and pepper, and it took a good amount of salt so it wasn't bland. I think I might even want to try to do this in a crock pot on low heat the next time.

Try this and let me know what you think.  I may even try this next Thanksgiving and really rock the boat of my tradition children who always want their Traditional Thanksgiving Soup with the little meatballs.

Everyone made a face when I told them what I was making, but when they tasted it....yummmmy!
My son, who made the most faces, went back for seconds!

I would like to give credit where credit is due for the soup, but the person who posted it didn't sign the post.  I don't want to post their e-mail address on the blog, so if any of you are reading this and you know their name, please let me know.

Here's the recipe (as written):


FOR THESE BRRRRR.DAYS, A GOOD PUMPKIN SOUP RECIPE


four (4) servings, 25 minutes preparation and 25 cooking time.


INGREDIENTS:

2 TABLESPOON OF BUTTER
1 TABLESPOON EXTRA VOO (SPREAD IN PAN)
2 CELERY RIBS (YOU CAN ADD THE GREEN) ALL FINELY CHOPPED
1 MEDIUM ONION- FINELY CHOPPED
SALT AND PEPPER TO TASTE
1- OR 2 BAY LEAVES
6 TO 7 CUPS OF CHICKEN OR VEGETABLE STOCK
1 TEASPOON OF THYME (ADJUST DESIRE AMOUNT TO TASTE)
3 TABLESPOON OF FLOUR (ALL PURPOSE) DEPENDS OF CONSISTENT DESIRED
2 CUPS OF HEAVY CREAM (IF SEVEN CUPS OF STOCK ARE USED ADD 1/3 CUP MORE OF CREAM)
CHIVE TO TASTE (I USE 2 LARGE FRESH CHIVES)
1 (LARGE CAN) OF COOKED PUMPKIN PUREE
DASH OF FRESH NUTMEG (GRATED)
MINT FOR DECORATION


INSTRUCTIONS:

IN A MEDIUM SAUCE PAN AT MEDIUM TO HIGH HEAT. HEAT OLIVE OIL, MELTING THE BUTTER THEN ADD THE BAY LEAVES,
ONION AND CELERY, SEASONING WITH SALT AND PEPPER UNTIL TENDER.
WHISK FLOUR AND THYME TO ABOVE MIXTURE COOKING FOR A MINUTE OR TWO THEN CONTINUE TO WHISK ADDING THE STOCK. 
BRINGING THE BROTH TO A SIMMER. 
START ADDING TO THE STOCK THE PUMPKIN PUREE IN LARGE QUANTITY WITH A LARGE SPOON CONTINUING TO WHISK THE MIXTURE WHILE YOU ARE ADDING.
LET IT SIMMER FOR APPROXIMATELY 10 TO 12 MINUTES THEN ADD THE CREAM AND NUTMEG.
MAINTAIN AT LOW HEAT TO KEEP WARM UNTIL READY TO SERVE AND GARNISH WITH CHIVES AND A MINT LEAVE.(DO NOT FORGET TO REMOVE THE BAY LEAVES................)

I USUALLY SERVE MY SOUP WITH SLICES OF ITALIAN BREAD AND SMALL MOZZARELLA BALLS 

ENJOY! - VON APETITE! - BUON APPETITO! - DISFRUTALO! 


Here are my changes ( by the way, this served 6 and there was more leftover, so I would say it serves closer to 10)


Pumpkin Soup

4 Tablespoons of butter
1 Tablespoon of extra virgin olive oil 
2 stalks of celery with the leaves, finely chopped 
1 medium onion, peeled and finely chopped
Salt and pepper to taste
2 Bay leaves
1 (48 ounce) can College Inn Chicken Broth
1 Teaspoon Thyme
3 -5 Tablespoons Wondra Flour (you can use all purpose, but I love Wondra for thickening)
2 Cups of Heavy  Cream 

Garlic Salt to taste (I used about 2 teaspoons)
Fresh chives to taste (I didn't have any handy)
3 (15 ounce) cans Pumpkin Puree
Dash of Fresh Nutmeg
Mint for Decoration

Instructions:


I always prepare my vegetables in advance, it makes it so much easier to make your recipe.  Dice your celery and onions and set them aside. Place the thyme into the flour and set aside.

In a 5-6 quart stockpot, on medium to medium high heat, heat  the olive oil and butter together  until the butter is melted.  Add the bay leaves, celery and onion.  Season with a liberal amount of salt and pepper, until tender, about 5-7  minutes.


Whisk in the flour and thyme mixture, cooking for about a minute or two; then whisk in the stock slowly until all the flour is blended in, and no lumps are visible.  Bring the broth to a boil, and then lower to a simmer. Add the pumpkin puree into the broth in large spoonfuls, whisking to keep it smooth. Let it simmer for about 15 minutes.


Whisk in the heavy cream.  Add the garlic salt, and once the cream is well incorporated, taste and re-season with additional salt, pepper, and garlic salt. I had to turn up the heat just a little to get the soup hot, but stir this very frequently and watch it carefully so it doesn't burn. Keep on a very low heat until ready to serve.  Remove the Bay Leaves.  Garnish with a few chives and a little freshly grated nutmeg.


Pumpkin Soup on Foodista

Thursday, December 3, 2009

Dinnerware Just in Time for the Holidays!


Hi Everyone,

I know it's been awhile but life had gotten in the way of my blog. I hope to be back on line shortly with more recipe postings.

In the meantime, I received an e-mail for Food Service Warehouse, stating that they are running a contest that is giving away "an elegant 12 place table setting set to one lucky person just in time for the holidays. This set includes high quality dinnerware, glassware, and flatware that will look great on any holiday table."

This would be a great prize to win now that the holidays are approaching. To learn more about this contest, please visit their website Food Service Warehouse. Good luck everyone, I hope one of my readers is the lucky winner.


Tuesday, August 25, 2009

The New Portuguese Table


The New Portuguese Table by David Leite

“Tomatoes and oregano make it Italian; wine and tarragon make it French. Sour cream makes it Russian; lemon and cinnamon make it Greek. Soy sauce makes it Chinese; garlic makes it good.” – Alice May Brock

I’d like to add an addendum to that quote and add this line, “David Leite makes Portuguese Cooking the star of the Mediterranean cuisines with his new cookbook, The New Portuguese Table.

If you aren’t already familiar with David Leite, you should be, because he is one of the forces of the food industry to be reckoned with. His website Leite’s Culinaria is perhaps one of the best food sites on the web. You can visit it and see for yourself at his website Leite's Culinaria.

He is a three times James Beard winning writer and publisher, his columns are seen in food related publications everywhere, and he is one of the nicest, (and funniest) people I have encountered on this road of culinary greatness. If anyone belongs in a “Cooking Hall of Fame”, David just earned his place with his fabulous new book.

As with most of us who grow up in the kitchens of fabulous cooks, we take their cooking skills for granted. Sometimes we rebel against our ethnicity in our quest to belong to America’s melting pot, and until we reach that magic age when our mothers, grandmothers, or in many cases, fathers and grandfathers are no longer around, and we miss the foods of our youth, do we set out to re-explore and recreate them.

This is precisely what David has done in his book. As a young book growing up in a Portuguese community in Fall River Massachusetts, he really didn’t want much to do with his Portuguese heritage. As he says so well in his book, “I sat in my parents’ closet stuffing Hostess cupcakes into my mouth, praying to be blond and blue-eyed, with a last name of Fitzgerald or Abernathy."

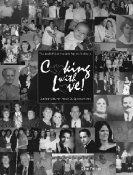
In my case, it was growing up in an Italian household in Brooklyn, but all of us have traveled that road at one time or another. It was the same feelings that prompted me to write my own families cooking heritage “Cooking with Love”, so that my families' future generations, when they finally awoke from their escape from who they were, could then reconnect with their roots.

David has taken this even one step further with an amazing collection of Portuguese recipes, a fabulous travel log into Portugal itself, and a amazing pictorial accompaniment to both the food and the country. Move over Sonnets from the Portuguese, there’s a new kid on the block, and he’s kicking your butt!

Included in the book are recipes not only from David’s family, but from his years of living in Portugal to research the book, he brings a collection of “new Portuguese” cuisine to the table.

He provides a detailed guide to Portugal’s food for those of you who may be lucky enough to travel to Portugal. He gives you the provinces, what to eat, and what to drink in all of them. He tells you how to stock a Portuguese pantry, the history of the recipes, the only thing he doesn’t do is come and cook in your kitchen...pity!

The photography, provided by Nuno Correia is amazing, you can smell the food right off the pages, place yourself in the countryside of the travel photos, and through David and Nuno collaboration you immerse yourself in the Portuguese culture and become a part of Portugal itself.

This is a cookbook that no kitchen should be without. Whether you are a fan of Portuguese cooking or not, there is something in this cookbook for everyone. From the Spicy Pumpkin Seeds, to the Green Olive Dip, from Sea Bass with Fennel and Orange to Roast Chicken with Potatoes, from Black Eyed Peas with Onions and Red Pepper to Cornbread, to the divine Rice Pudding Redux, there is something for everyone is this book. As David says, this is the “New” Portuguese Table. The ingredients used in this book are the ingredients found in everyone’s pantry (unless you happen to be one of my sons who have nothing in the cabinets until I come to visit.)

BUY THIS BOOK!!! BUY THIS BOOK!!! BUY THIS BOOK!!!!

(Whew, once was not enough to say it)

Contents:

Introduction: Confessions of a Late Blooming Lusophile

1. Portuguese Parsed

2. The Portuguese Pantry

3. Little Bites

4. Soups

5. Fish and Shellfish

6. Poultry

7. Meats

8. Eggs, Vegetables and Rice

9. Breads

10. Sweets and Liqueurs

11. Sundries

Acknowlegments

Sources

Index

If you love Italian Food, French Food, Spanish Food, and have never tried Portuguese food before, I think you will be most pleasantly surprised, and soon, you’ll be a fan. For me personally, this book was a trip down the culinary memory lane of my youth because many of the food were very similar to my own upbringing; the fried dough from David’s grandmother, the Baccala on Christmas Eve, my Aunt Frances’ table filled with her Portuguese dishes prepared lovingly for my Uncle Manuel (who was of Portuguese descent) while he sat smoking his cigars… Thank you David for making me remember!

As my father would say, "If you cook it with love, it will always taste delicious."

Once again, the book should come with a warning: When reading this book you may be tempted to cook everything on the pages, gain a hundred pounds and become supremely happy and sated.

I always include a recipe from the book I am reviewing and this is no exception. As always, it is difficult to make a choice, but I decided to pick the Sweet Lemon and Black Olive Wafers as my choice as I found the combination intriguing in a cookie. David says that he had this at a dinner party and forgot to get the recipe so he recreated it himself. I just found this link of David making the cookies in a video - check it out...


Sweet Lemon and Black Olive Wafers:

1½ cups all purpose flour

½ cup mild oil cured black olives, rinsed quickly if particularly salty, and coarsely chopped

¼ cup sugar, plus more for coating

¼ teaspoon baking powder

2 tablespoons grated lemon zest

1/8-teaspoon ground cinnamon

Pinch of Kosher salt

¼ cup extra virgin olive oil

1 large egg, beaten

1. Position a rack in the upper third of the oven and crank of heat to 375ÂşF.

2. Stir together the flour, olives, sugar, baking powder, zest, cinnamon, and salt in a medium bowl. Whisk together the oil and egg, pour the mixture into the dry ingredients, and mix with your hands until the dough no longer looks dry and holds together when squeezed, 1 to 2 minutes

3. Fill a small bowl with sugar and set nearby. Pinch off 1 rounded tablespoon (about 1 ounce) of dough, roll into a ball, and coat it with sugar. Place it in one corner of a sheet of parchment cut to it your baking sheet, place another piece of parchment on top, and using a rolling pin, roll the ball into a 3½ to 4-inch circle, a scant 1/16 inch thick. The edges will be ragged; that’s how they should be. Repeat with 5 more wafers on the same sheet. Lift off the top sheet and slip the parchment with the cookies onto the baking sheet.

4. Bake until the wafers are edged with brown and pebbles on the top, 10 to 12 minutes. Side the parchment onto a wire cooling rack. Repeat with the remaining dough. Once cooled, the wafers will keep in an airtight container for several days, but I doubt they’ll stick around that long.

It is not often that I purchase a cookbook that I actually cook from. In fact, other than Ina Garten, off hand, I can’t recall too many that I use. However, I know that I will be trying recipes from this book. The statistics say that if you shop for a cookbook and see two recipes in a book that you are tempted to try you will buy the book. This book is surely a winner, because I want to try almost everything (sorry David – I’m not a fan of Cod) but everything else is a go for me! Again, buy this book, you won’t be disappointed!

Book Title: The New Portuguese Table

Author: David Leite

Category: Ethnic Cookery

ISBN: 978-0-307-39441-5

Publisher: Clarkson N. Potter a division of Random House

Publishers Address: 1745 Broadway, New York, New York 10019

Website: http://www.randomhouse.com/crown/clarksonpotter.html

Published: 2009

Edition: First

Description: Hard Cover

Illustrations: No

Photographs: Fabulous color photography of both food and Portugal

Price: $32.50

Reviewed by: Elise Feiner - August 25, 2009

David, you did your mother, aunts, and grandmother proud. You have put Portugal back on the culinary map…congratulations

The New Portuguese Table can be ordered by scrolling down to the bottom of the blog to our Foodfanataholics Cookbook Nook, go to the sidebar on the right and click on Cookbook of the Month, clicking at the top of the blog on the sidebar, or by visiting David’s website.

Friday, August 7, 2009

Enjoying the Summer

As you know, I have taken the summer off. There have been lots of wonderful things happening in my life and I have been enjoying the hiatus. I am actually enjoying cooking without having to take pictures of everything I do for a change. I have been baking and cooking. I have used my cookbook all summer long. I made a delicious Rum Cake the other day that was to die for. I actually was going to take pictures but they ate it so fast there wasn't time. You can enjoy many of the recipes on the blog and hundreds more in my cookbook, Cooking with Love.


Think about buying a copy for yourself. There are over 1000 recipes in the book. I've made it easy by putting a Paypal button on the site. Just click and order!

As for me, as you can see by the pictures below, I am out and about celebrating
my son Steven's engagement to JoAnna,


and a few days later both getting sworn into the NYS Bar Association,


my son David starting his residency in Orthopedics,


my daughter Lauren's promotion at the Wynn, my son Jeff's year as Chief Resident, my friend Fran's new granddaughter Jemma Rose Zierler,


(Me and Jemma Rose - what a cutie)

visiting family and friends,


(the Feiner girls hit Niagara Falls - Lauren, me, and Barbara)

in Baltimore with Jeff, Marc, and Aaron Epstein


The Cousins Club
(Uncle Enzo and his Harem - all the New York Mets Groupies of old)


taking the kids to visit
Lauren in Las Vegas and then on to California,


and just cruising on our boat in Old Forge.

I hope you are all having a blessed, peaceful summer...

For me, it's time to help plan a wedding!

Saturday, June 6, 2009

Cookie Foodfanataholic - Then you won't want to miss this post on The Cookie Blog!


I did say that I wouldn't be gone forever, but I'll probably post less frequently. Since I was missing the blog, and felt like a part of me was missing, I decided to do a post about a friend of mine, Tiffany McCauley.

We met because we are fellow food bloggers, and like all food bloggers, we like to support and expose people to the blogs that we love. Tiffany's blog is all about cookies...she is the ultimate cookie baker. If you want to know about cookies, from how to bake them to how to open your own cookie business, Tiffany is your go t0 source. In fact, Tiffany is so good at what she does that she just finished writing an eBook called “The Sweeter Side Of Life - How to start your own cookie business, avoid pitfalls and find success." The book sells for $14.95. Here is the link to purchase "The Sweeter Side of Life."

Tiffany wrote the eBook in response to the numerous questions that she was receiving from people who were asking her advice on how she started her own cookie business. She decided that rather than try to repeatedly answer the same questions, she would put her answers into a book so people could read it and keep it as a reference source.

This book covers everything from FDA regulations to marketing on a small budget, as well as giving tons of resources and contacts for many cookie business needs. She also covers how to price your cookies and how to find balance between your business and your life.

This book is a must have if you have any desire at all to open a cookie business, or if you are just a cookie foodfanataholic!

Tiffany started Ohma's Cookies in 2008. It was a small, one-woman operation that grew surprisingly quickly. In fact, it started to grow so quickly that she just couldn't handle it on her own any longer. With a young son at home, she sadly decided that her cookie business would just have to wait. She closed her kitchen indefinitely, but not being one to give up easily, she continued with her dream by writing a blog TheCookieBlog.com, and it was there where she first began to counsel others on how to start their own businesses. This arrangement has turned out to be the best of both worlds for Tiffany. She can take care of her son, and still be involved in the wonderful world of cookies. Her blog is just fabulous, please check it out.

Tiffany generously contributed one of her favorite recipes for me to share will all my readers called Agave Sweetened, Whole Wheat Chocolate Chip Cookies.

This recipe is one that will be in her upcoming eBook "Naturally Sweet Drop Cookies - Cookies Sweetened with Agave Nectar." Tiffany says, "This is the only place you'll find this recipe, other than my upcoming book... so enjoy! These cookies are a staple around my house. They are soft, chewy and full of chocolatey goodness."

A note from Tiffany: "When I bake, I bake by weight, not volume because it’s so much more exact."

Agave Sweetened, Whole Wheat Chocolate Chip Cookies

Ingredients:

240 gm Whole Wheat Pastry Flour
200 gm Grain Sweetened Chocolate Chips
2 Tbs. Cinnamon
1 tsp Baking Powder
200 gm Butter (softened)
240 gm Agave (light)
2 Eggs (room temperature)
2 tsp Vanilla

Directions:

Preheat your oven to 350 degrees. Line your cookie sheets with parchment paper.

In a bowl, mix your flour, chocolate chips, cinnamon and baking powder. Stir well to properly coat the chocolate chips with the flour mixture, and set aside.

In a mixing bowl, cream your butter. Add agave and blend. Add eggs and vanilla, and blend again.

Using a spoon or spatula, add the flour mixture to your bowl of wet ingredients. Stir well.

Using a size 40 cookie dough scoop or two regular teaspoons, scoop or spoon your dough onto your cookie sheet. Be sure to allow enough room as these cookies will spread.

Bake for 10-12 minutes, or until the edges of your cookies are just barely golden brown, and the middle looks baked through.

Makes approximately 30 cookies.

Tuesday, May 26, 2009

Chicken Pillows

I was looking at some other food blogs recently and one of them was called Real Mom Kitchen. She had a recipe on her blog called Chicken Pillows and I had some leftover chicken, so I thought I'd try it. Of course, never being one to follow a recipe as it was written, this is my version.

If you would like to see the original post from Real Mom Kitchen click the link for
Chicken Pillows. Laura has some really wonderful recipes on her blog so be sure to check if out when you get the chance.

This was a great way to use up the leftover chicken. Sort of a cross between a chicken pot pie and a chicken croquette. I loved the sauce. I think if I make them again, I might use the regular size crescent rolls and make them a little smaller. I had enough filling left over to have done one more pillow, but the jumbo crescent rolls only come 6 to a package, so you can only get 3 instead of four pillows.

Here is my version of Laura's Chicken Pillows

2-3 cups chicken, cooked and cubed or shredded
1 (8 ounce) package of cream cheese, softened
2 -3 scallions, sliced thinly
1 (4 ounce) can chopped mushrooms
1 red onion, peeled and thinly sliced
4 tablespoons butter, softened
¼ teaspoon salt
1 teaspoon garlic salt
Dash of pepper
¼ teaspoon Mrs. Dash
¼ cup milk
1 cans of crescent rolls (I used the new Premium size)
½ cup Bread crumbs
¾ cup Panko Crumbs
¼ cup grated cheese
1 stick melted butter


Melt two tablespoons of butter in a frying pan. Add the red onions and sauté a few minutes until soft; add the scallions and mushrooms. Sauté for a few more minutes until nicely caramelized. Add in the other 2 tablespoons of butter and let it melt.

In large bowl, mix together cream cheese and the milk with a fork. Add vegetable mix, additional salt, and pepper to taste. Stir in chicken and set aside. Open crescent rolls and carefully unroll dough. Separate each tube into 4 rectangles. Seal seam in center of each rectangle. Place one heaping tablespoon on half of each rectangle. Fold over other half of roll dough and seal edges, creating a pillow. Brush the top of each pillow with melted butter and then Panko/Breadcrumb mix, butter side down. Brush the other side and dip it into Panko/Breadcrumb mix. Place on baking sheet that has been Sprayed with PAM. Bake at 350 degrees for 15-20 minutes or until golden brown. Serve with cream sauce.

Cream sauce:

1 can cream of chicken of chicken soup
1 cup sour cream
1/8 teaspoon seasoned salt
¼ teaspoon Mrs. Dash
1 tablespoon mayonnaise

Milk (about ½ of the empty soup can)

¼-1/2 teaspoon garlic salt
Freshly ground black Pepper

Combine ingredients in sauce pan and cook over medium heat, gently bring to a boil and lower to a simmer until heated thoroughly.

Here is what you will need for the recipe:

Laura's chicken Pillows:
2-3 cups chicken, cooked and cubed or shredded
1 (8 ounce) package of cream cheese, softened
2 -3 scallions, sliced thinly
1 (4 ounce) can chopped mushrooms
1 red onion, peeled and thinly sliced
4 tablespoons butter, softened
¼ teaspoon salt
1 teaspoon garlic salt
Dash of pepper
¼ teaspoon Mrs. Dash
¼ cup milk
1 cans of crescent rolls (I used the new Premium size)
½ cup Bread crumbs
¾ cup Panko Crumbs
¼ cup grated cheese
1 stick melted butter


Melt two tablespoons of butter in a frying pan. Add the red onions and sauté a few minutes until soft; add the scallions and mushrooms. Sauté for a few more minutes until nicely caramelized. Add in the other 2 tablespoons of butter and let it melt.

In large bowl, mix together cream cheese and the milk with a fork. Add vegetable mix, additional salt, and pepper to taste. Stir in chicken and set aside. Open crescent rolls and carefully unroll dough. Separate each tube into 4 rectangles. Seal seam in center of each rectangle. Place one heaping tablespoon on half of each rectangle. Fold over other half of roll dough and seal edges, creating a pillow. Brush the top of each pillow with melted butter and then Panko/Breadcrumb mix, butter side down. Brush the other side and dip it into Panko/Breadcrumb mix. Place on baking sheet that has been Sprayed with PAM. Bake at 350 degrees for 15-20 minutes or until golden brown. Serve with cream sauce.

Cream sauce:

1 can cream of chicken of chicken soup
1 cup sour cream
1/8 teaspoon seasoned salt
¼ teaspoon Mrs. Dash
1 tablespoon mayonnaise

Milk (about ½ of the empty soup can)

¼-1/2 teaspoon garlic salt
Freshly ground black Pepper

Combine ingredients in sauce pan and cook over medium heat, gently bring to a boil and lower to a simmer until heated thoroughly.


Monday, May 25, 2009

Just a Reminder

I just wanted to let everyone know that I am not gone forever, just a little while to get some things done, and regroup some things on the blog. Many of you have e-mailed me and said you will miss me (awww, thank you), but I am not going away, just taking a small break...be back soon!

Elise

Saturday, May 23, 2009

A Quick Note

To all of my wonderful friends and followers,

I just wanted to let you know that I am taking a little vacation from blogging for awhile. I need a spring cleaning of the brain so to speak. There is a lot going on in my life right now, and I want to continue to do the blog in the same format, but unfortunately, it is consuming a lot of my time. I will continue to post periodically, but not on a daily basis for awhile. I have lots of recipes to bring you, but the format I am using now is very time consuming.

I will be attending the Fancy Food Show at the end of June and hope to bring you lots of news and new product information from there.

I didn't want any of you to wonder what happened, but I need to focus on life for a little while, things like cleaning out my closets, planning an event of two, just some day to day things I was running out of time to do.

Please check back periodically!

Friday, May 22, 2009

Not the Earl of Sandwich - but a Sandwich Contest


The warm weather is on its way, and along with that comes picnic season, boating season, family day trips, and included in all those activities, is the picnic lunch. Most of us pack some type of sandwich in our picnic lunches, along with several other types of goodies. Now comes a chance for you to shine and tell the world what your favorite sandwich is.

One of my publicist friends just let me know that the Mezzetta Company, based in Napa Valley is running a contest for a fantastic sandwich recipe. The sandwich can be a cold sandwich, a hot sandwich, or a vegetarian sandwich.

The Mezzettas are offering $25,000 and a trip to Napa Valley as the grand prize - not too shabby to create a fabulous sandwich!

Entries for the contest will be accepted starting this Monday and running through Labor Day.
The Mezzettas are known for their pepper and olive products among a whole host of other goodies. You should check out their website for some great recipes at Mezzetta.

To find out the specifics of the contest, here is the direct link. Please read the rules carefully as you must include two or more of the wonderful products that Mezzetta produces in your sandwiches (specialty peppers, olives or other gourmet foods are among your choices).

Just so you have some idea of what they are looking for, here is last year's grand prize winner...


Spanish Style Grilled Cheese Sandwich
Edwina Gadsby

Recipe Category: Hot
Prep Time: 10 minutes
Total Time: 20 minutes
Servings: 4


Ingredients:

8 (1/2-inch-thick) slices peasant bread or other artisan bread
3 cups shredded Manchego cheese
3 ounces thinly sliced Serrano ham or prosciutto

Smoky Paprika Roasted Pepper & Tomato Topping:

1 tablespoon sherry vinegar
1 teaspoon smoked paprika
3 to 4 tablespoons Mezzetta Extra Virgin Olive Oil - divided
1 tablespoon Mezzetta Crushed Garlic
1 cup Mezzetta Roasted Red Pepper Strips
1 cup Mezzetta Sun-Dried Tomatoes in Olive Oil
3 tablespoons chopped flat-leaf parsley or cilantro

Directions:

For Topping: Whisk together vinegar, paprika, 1 tablespoon Mezzetta Extra Virgin Olive Oil, and Mezzetta Crushed Garlic in bowl. Add Mezzetta Roasted Red Pepper Strips, Mezzetta Sun-Dried Tomatoes, and parsley (or cilantro); tossing to coat.

For Sandwiches: Sprinkle 4 slices of bread with half the cheese. Top with Smoky Paprika Roasted Pepper & Tomato Topping and ham. Apply the remaining cheese as another layer. Top with a second piece of bread and press together.

Brush sandwiches with remaining Mezzetta Extra Virgin Olive Oil and heat in a panini press or skillet until lightly browned on both sides and cheese has melted. Serve hot.

Makes 4 sandwiches

So dig out your creative chef's hat, start making those sandwiches and perhaps, this will be your year to shine!

Thursday, May 21, 2009

Banana Bread

My kids love Banana Bread, always have, always will. It is one of their most requested things for me to make when they come home. They always want to take some home with them. This is a really easy recipe to make. You can make it in two large loaf pans, but I always use mini loaf pans and the recipe yields about 6-7 mini loaves.

BANANA BREAD FEINER
Elise Feiner

½ cup vegetable oil (Wesson®)
1 cup sugar
2 eggs, slightly beaten
3 ripe bananas, mashed with a fork
2 cups all purpose flour
1 teaspoon baking soda
½ teaspoon baking powder
½ teaspoon salt
3 tablespoons milk
½ teaspoon vanilla extract
1 (6 or 12 ounce) bag miniature chocolate chips, depending on your preference
½ cup chopped nuts (optional)

Preheat the oven to 350° F. Beat oil and sugar together with a hand mixer or KitchenAid stand mixer (or whatever brand you use), until well combined. Add eggs and mashed banana pulp and beat well. Sift together the flour, baking soda, baking powder and salt. Add sifted dry ingredients, milk, and vanilla. Mix well and stir in chocolate chips, and nuts if desired. Pour into mini loaf pans or a large loaf pan which has been greased and floured. Bake at 350° for about 20 to 25 minutes for the mini loaves and 60 minutes for the large loaf. Cool well. Serves 6 normal people or one to two growing Feiner Boys! Use leftover slices for French Toast.

This is what you will need for the recipe:

½ cup vegetable oil (Wesson®)
1 cup sugar
2 eggs, slightly beaten
3 ripe bananas, mashed with a fork
2 cups all purpose flour
1 teaspoon baking soda
½ teaspoon baking powder
½ teaspoon salt
3 tablespoons milk
½ teaspoon vanilla extract
1 (6 or 12 ounce) bag miniature chocolate chips, depending on your preference
½ cup chopped nuts (optional)

As always, let's get the prep work out of the way...

Preheat the oven to 350° F.


Spray your loaf pans with PAM or other non stick spray


Your bananas should be fairly brown (this makes them sweet)


Peel the bananas


Mash the bananas with a fork

Sift together your dry ingredients
(I like to use a paper dish so I can easily
fold it to insert it into the stand mixer's bowl.)

Measure out your flour and put it in a paper plate
or whatever you want to use - add the baking soda


Baking powder

and salt

Mix until well blended - I use a spoon
After you mix it together, set it aside

Beat your eggs and set aside (I forgot to do this )

Put the oil and sugar together into a mixing bowl


Beat oil and sugar together with a hand mixer or
KitchenAid stand mixer (or whatever brand you use),
until well combined.

Add the eggs (I just added them and forgot to beat them -
Beat them slightly first)


and mashed banana pulp and beat well.


Add sifted dry ingredients,
(see how easy it is with the paper dish)


Beat well

until well blended


add the milk,


and vanilla (I always use Mexican Vanilla, there is a link
at the bottom of the blog to purchase it.)

Mix well

until all combined


and stir in chocolate chips, and nuts if desired.


Pour (I use a gravy ladle) into mini loaf pans
or a large loaf pan which has been greased.

Bake in the preheated 350° for about
20 to 25 minutes for the mini loaves and
60 minutes for the large loaf.

Test for doneness by either pressing
lightly with your finger
(cake should spring back)
or
inserting s cake tester
(I use a bamboo skewer- I always have a pack of these handy)
and making sure it comes out clean and dry


Let cool in the pans for a few minutes


Cool well on wire racks.


Serves 6 normal people or one to two growing Feiner Boys!
Use leftover slices for French Toast (but don't count on leftovers, :)
These freeze very well.


Bookmark and Share


Banana Bread feiner on Foodista