Showing posts with label Cookbooks. Show all posts

Tuesday, August 25, 2009

The New Portuguese Table


The New Portuguese Table by David Leite

“Tomatoes and oregano make it Italian; wine and tarragon make it French. Sour cream makes it Russian; lemon and cinnamon make it Greek. Soy sauce makes it Chinese; garlic makes it good.” – Alice May Brock

I’d like to add an addendum to that quote and add this line, “David Leite makes Portuguese Cooking the star of the Mediterranean cuisines with his new cookbook, The New Portuguese Table.

If you aren’t already familiar with David Leite, you should be, because he is one of the forces of the food industry to be reckoned with. His website Leite’s Culinaria is perhaps one of the best food sites on the web. You can visit it and see for yourself at his website Leite's Culinaria.

He is a three times James Beard winning writer and publisher, his columns are seen in food related publications everywhere, and he is one of the nicest, (and funniest) people I have encountered on this road of culinary greatness. If anyone belongs in a “Cooking Hall of Fame”, David just earned his place with his fabulous new book.

As with most of us who grow up in the kitchens of fabulous cooks, we take their cooking skills for granted. Sometimes we rebel against our ethnicity in our quest to belong to America’s melting pot, and until we reach that magic age when our mothers, grandmothers, or in many cases, fathers and grandfathers are no longer around, and we miss the foods of our youth, do we set out to re-explore and recreate them.

This is precisely what David has done in his book. As a young book growing up in a Portuguese community in Fall River Massachusetts, he really didn’t want much to do with his Portuguese heritage. As he says so well in his book, “I sat in my parents’ closet stuffing Hostess cupcakes into my mouth, praying to be blond and blue-eyed, with a last name of Fitzgerald or Abernathy."

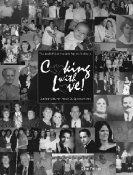
In my case, it was growing up in an Italian household in Brooklyn, but all of us have traveled that road at one time or another. It was the same feelings that prompted me to write my own families cooking heritage “Cooking with Love”, so that my families' future generations, when they finally awoke from their escape from who they were, could then reconnect with their roots.

David has taken this even one step further with an amazing collection of Portuguese recipes, a fabulous travel log into Portugal itself, and a amazing pictorial accompaniment to both the food and the country. Move over Sonnets from the Portuguese, there’s a new kid on the block, and he’s kicking your butt!

Included in the book are recipes not only from David’s family, but from his years of living in Portugal to research the book, he brings a collection of “new Portuguese” cuisine to the table.

He provides a detailed guide to Portugal’s food for those of you who may be lucky enough to travel to Portugal. He gives you the provinces, what to eat, and what to drink in all of them. He tells you how to stock a Portuguese pantry, the history of the recipes, the only thing he doesn’t do is come and cook in your kitchen...pity!

The photography, provided by Nuno Correia is amazing, you can smell the food right off the pages, place yourself in the countryside of the travel photos, and through David and Nuno collaboration you immerse yourself in the Portuguese culture and become a part of Portugal itself.

This is a cookbook that no kitchen should be without. Whether you are a fan of Portuguese cooking or not, there is something in this cookbook for everyone. From the Spicy Pumpkin Seeds, to the Green Olive Dip, from Sea Bass with Fennel and Orange to Roast Chicken with Potatoes, from Black Eyed Peas with Onions and Red Pepper to Cornbread, to the divine Rice Pudding Redux, there is something for everyone is this book. As David says, this is the “New” Portuguese Table. The ingredients used in this book are the ingredients found in everyone’s pantry (unless you happen to be one of my sons who have nothing in the cabinets until I come to visit.)

BUY THIS BOOK!!! BUY THIS BOOK!!! BUY THIS BOOK!!!!

(Whew, once was not enough to say it)

Contents:

Introduction: Confessions of a Late Blooming Lusophile

1. Portuguese Parsed

2. The Portuguese Pantry

3. Little Bites

4. Soups

5. Fish and Shellfish

6. Poultry

7. Meats

8. Eggs, Vegetables and Rice

9. Breads

10. Sweets and Liqueurs

11. Sundries

Acknowlegments

Sources

Index

If you love Italian Food, French Food, Spanish Food, and have never tried Portuguese food before, I think you will be most pleasantly surprised, and soon, you’ll be a fan. For me personally, this book was a trip down the culinary memory lane of my youth because many of the food were very similar to my own upbringing; the fried dough from David’s grandmother, the Baccala on Christmas Eve, my Aunt Frances’ table filled with her Portuguese dishes prepared lovingly for my Uncle Manuel (who was of Portuguese descent) while he sat smoking his cigars… Thank you David for making me remember!

As my father would say, "If you cook it with love, it will always taste delicious."

Once again, the book should come with a warning: When reading this book you may be tempted to cook everything on the pages, gain a hundred pounds and become supremely happy and sated.

I always include a recipe from the book I am reviewing and this is no exception. As always, it is difficult to make a choice, but I decided to pick the Sweet Lemon and Black Olive Wafers as my choice as I found the combination intriguing in a cookie. David says that he had this at a dinner party and forgot to get the recipe so he recreated it himself. I just found this link of David making the cookies in a video - check it out...


Sweet Lemon and Black Olive Wafers:

1½ cups all purpose flour

½ cup mild oil cured black olives, rinsed quickly if particularly salty, and coarsely chopped

¼ cup sugar, plus more for coating

¼ teaspoon baking powder

2 tablespoons grated lemon zest

1/8-teaspoon ground cinnamon

Pinch of Kosher salt

¼ cup extra virgin olive oil

1 large egg, beaten

1. Position a rack in the upper third of the oven and crank of heat to 375ºF.

2. Stir together the flour, olives, sugar, baking powder, zest, cinnamon, and salt in a medium bowl. Whisk together the oil and egg, pour the mixture into the dry ingredients, and mix with your hands until the dough no longer looks dry and holds together when squeezed, 1 to 2 minutes

3. Fill a small bowl with sugar and set nearby. Pinch off 1 rounded tablespoon (about 1 ounce) of dough, roll into a ball, and coat it with sugar. Place it in one corner of a sheet of parchment cut to it your baking sheet, place another piece of parchment on top, and using a rolling pin, roll the ball into a 3½ to 4-inch circle, a scant 1/16 inch thick. The edges will be ragged; that’s how they should be. Repeat with 5 more wafers on the same sheet. Lift off the top sheet and slip the parchment with the cookies onto the baking sheet.

4. Bake until the wafers are edged with brown and pebbles on the top, 10 to 12 minutes. Side the parchment onto a wire cooling rack. Repeat with the remaining dough. Once cooled, the wafers will keep in an airtight container for several days, but I doubt they’ll stick around that long.

It is not often that I purchase a cookbook that I actually cook from. In fact, other than Ina Garten, off hand, I can’t recall too many that I use. However, I know that I will be trying recipes from this book. The statistics say that if you shop for a cookbook and see two recipes in a book that you are tempted to try you will buy the book. This book is surely a winner, because I want to try almost everything (sorry David – I’m not a fan of Cod) but everything else is a go for me! Again, buy this book, you won’t be disappointed!

Book Title: The New Portuguese Table

Author: David Leite

Category: Ethnic Cookery

ISBN: 978-0-307-39441-5

Publisher: Clarkson N. Potter a division of Random House

Publishers Address: 1745 Broadway, New York, New York 10019

Website: http://www.randomhouse.com/crown/clarksonpotter.html

Published: 2009

Edition: First

Description: Hard Cover

Illustrations: No

Photographs: Fabulous color photography of both food and Portugal

Price: $32.50

Reviewed by: Elise Feiner - August 25, 2009

David, you did your mother, aunts, and grandmother proud. You have put Portugal back on the culinary map…congratulations

The New Portuguese Table can be ordered by scrolling down to the bottom of the blog to our Foodfanataholics Cookbook Nook, go to the sidebar on the right and click on Cookbook of the Month, clicking at the top of the blog on the sidebar, or by visiting David’s website.

Thursday, May 14, 2009

Artisan Bread in Five Minutes with Fresh Roasted Garlic


Artisan Bread in Five Minutes a Day

Jeff Hertzberg and Zoe Francois

I purchased this book a while ago having heard about it on the radio. I put it on the shelf where it sat forever. One night, I flipped through it quickly, and thought when I have some time, I’ll try it. I forgot about it and then suddenly, everywhere I turned this book or comments about it kept popping up. I took it out again and decided to read it.

How could it be possible that you could make delicious artisan bread in five minutes, with no kneading, no proofing – I wasn’t sold…how could this be? I was torn here...as I love bread. If I was stranded on a desert island and could pick one food I would probably choose bread (as long as I could make butter!)


One of the authors, Jeff Hertzberg, is a New York City person like me. I actually know the area that he grew up quite well, as I lived very close by. He was right about the bakeries and the breads that we were able to buy when we were growing up. They were delicious, crispy on the outside, moist on the inside and they didn’t turn to mold in one day.

We have a running joke in my family. My Uncle Frank, who was a surgeon used to have an office in Brooklyn, on Kings Highway. Every Sunday, after he made rounds on his patients he would stop at this little shop in Brooklyn and buy several loaves of what we called “Chinzullo’s bread”. It was a huge round loaf, which they would pre-slice and you could freeze it and it would taste just as delicious thawed as the day you brought it home. Of course, my Aunt Edith and I would slather ours with butter and eat it right away.

Shortly after I got married, I asked Marc to go to the store and get some Chinzullo bread (thinking he knew I meant a round hard crust loaf). He went to five bakeries on Staten Island, asking for Chinzullo bread and no one knew what he was talking about. We never told him that Chinzullo was the baker’s name (he is reported to be actor Vince Edwards' father by the way), and not the name of the bread. We still laugh about that until this day. It was my revenge for a pickled herring story, that I’ll save for another day!

The point of the story is that I finally tried the recipe in the book for the basic boule, and lo and behold, I had created Chinzullo bread in my own kitchen in five minutes. I still can’t believe it! This bread was the most delicious bread and so easy to do. You mix the four ingredients in a large bowl (with a spoon or a mixer), let it rest on the counter two hours to rise, refrigerate it, and in three hours, you’re good to go. It doesn’t get any easier than that. The book is everything it promises to be.

Jeff Hertzberg, who by the way is a physician, met his co-author Zoe Francois, at their childrens' music class. He had been working on this recipe of trying to recreate the breads of his youth, and she was a professional baker, a match made in heaven! They have perfect the perfect bread recipes. I tried the basic one, and I am going through this book until I have baked them all!

The book begins with how the recipe came about. It then goes on to tell the secret of this recipe, moist and wet dough. It continues with an introduction, ingredients, equipment, tips and techniques, and then the bread recipes, and there are so many, but they all stem from about four or five basic recipes…it’s mind boggling!

I love this book, and I love this bread. I have recommended it to so many of my friends, and bought copies for all my kids along with a pizza peel and a baking stone, which is about all you need to be a success. If I had to pick the one cookbook I couldn’t do without , (other than my own of course) this would be it.

Among the recipes included in the book are recipes for Rye, and Pumpernickel breads, Egg Breads, Brioches, Olive Bread, Pita Bread, Pizza Dough, Bagels, Oatmeal Bread, Vermont Cheddar Bread, Challah, Pastries, Pretzels, and on and on. I can’t wait to be able to try all the others – olive bread is next up for me!

The convenience of being able to store bread in your refrigerator and bake a loaf every night with dinner is amazing, especially when all you have to do pull a piece of dough, let it rise on the peel for 1 – 1½ hours, pop it in the oven and bake it 30 minutes, let it cool for about 20 minutes eat and enjoy!


Contents:
Acknowledgments
The Secret
Preface
1. Introduction
2: Ingredients
3: Equipment
4: Tips and Techniques
5: The Master Recipe
6: Peasant Loaves
7: Flatbreads and Pizzas
8: Enriched Breads and Pastries
Index
Sources Bread-Baking Products

There was no contest as to which recipe to choose to post on the blog. The recipe is for The Master Recipe or Boule. It is so easy, one, two, three, and you’re done.

The Master Recipe – Boule

3 cups lukewarm water (about 100 degrees)
1 1/2 tablespoons granulated yeast (2 packages)
1 1/2 tablespoons kosher salt or other coarse salt
6 1/2 cups flour, unsifted, unbleached, all-purpose (use individual measuring cups and scoop and level off the top with a knife being careful not to press down on the flour
Cornmeal for the pizza peel

I am giving you a quick synopsis of the directions here because they are a few pages long. You can go to their website Artisan Bread in Five and see an actual video of the process. Besides, you are going to run right out and buy this book. Actually, call the book stores first, they are always sold out, then just click on the side and order it from Amazon, because that’s what you’ll have to do if you want a copy anyway.

Mixing and storing the dough:

In a large storage container (one that is not airtight - I used a cereal storage container), add the warm water, yeast, and salt. Add the flour and mix with a wooden spoon or a mixer with a dough hook. You really just need a spoon, and stir until all the flour is incorporated.

Don't knead, it isn't necessary. You're finished when everything is uniformly moist, without dry patches. It takes a few minutes, and will yield a dough that is wet and loose enough to conform to the shape of its container.

Allow to rise on your counter at room temperature for at least 2-3 hours. Cover with lid (not airtight or it could explode the lid off). Allow the mixture to rise at room temperature until it begins to collapse (or at least flattens on the top), approx 2 hours, depending on room temperature, and initial water temperature Longer rising times, up to 5 hours, won't harm the result.

You can use a portion of the dough any time after this period, but it is better to refrigerate the dough for use the next day. Fully refrigerated dough is less sticky and easier to work with than dough at room temperature.


On Baking Day:

Place some cornmeal on a pizza peel to make it easier to slide your dough onto a baking stone.
Preheat a baking stone in a 450 degree oven for at least 20 minutes, on the middle shelf. Place an empty roasting pan on the bottom shelf at the same time.

Sprinkle the surface of your refrigerated dough with flour. Pull up and cut off a grapefruit-size piece of dough (about 1 lb), using a serrated knife. Sprinkle with a little more flour. Hold the mass of dough in your hands and add a little more flour as needed so it won't stick to your hands. Gently stretch the surface of the dough around to the bottom on all 4 sides, rotating the ball a quarter-turn as you go. Most of the dusting flour will fall off - that's fine, it isn't meant to be incorporated. The bottom of the loaf may appear to be a collection of bunched ends, but it will sort itself out during resting and baking.

The correctly shaped final product will be smooth and cohesive. The entire process should take no more than 30 - 60 seconds.

Place the loaf on the peel, and let it rise for at least 1 1/2 hours if the dough was refrigerated. Depending on the age of the dough, you may not see much rise during this period. That's fine, more rising will occur during baking.

Just before placing the bread in the oven, dust the top of the loaf liberally with flour, which will allow the slashing knife to pass without sticking. Slash a quarter inch deep cross, diagonal lines, or tic-tac-toe pattern on top using a serrated knife.

Just before you open the oven door to slide the loaf onto the stone, fill a measuring cup with hot water and put it right on top of the oven.

After a 20 minute preheat you're ready to bake, even though the oven thermometer won't be at full temperature yet. Put your loaf in the oven. Quickly, pour about 1 cup of hot water (from the tap) into the roasting pan and close the oven to trap the steam.

Bake for about 30 minutes, or until the crust is nicely browned and firm to the touch.

Store the rest of the dough in the fridge in your lidded (not airtight) container and use it over the next 14 days. The flavor and texture improves, becoming like sourdough. Even 24 hours of storage improves the flavor.

This is the standard bread. There are tons of variations - both savory and sweet in the book. You will never be bored and it's so easy!

Makes 4 (1 pound) loaves


Book Title: Artisan Bread In Five Minutes a Day
Author: Jeff Hertzberg and Zoe Francois
Category: Specialty Cookbooks
ISBN 13 978-0-312-36291-1
ISBN 100-312-36291-9
Publisher: St. Martin’s Press
175 Fifth Avenue, New York, New York 1010
Website: http://www.stmartins.com
Edition: First
Description: Hard Cover
Illustrations: No
Photographs: Black and White, and Color Photos
Price: $27.95
Reviewed by: Elise Feiner – April 28, 2009


Artisan Bread in Five Minutes a Day can be ordered by scrolling down to the bottom of the blog to our Foodfanataholics Cookbook Nook, or, go to the sidebar on the right and click on Cookbook of the Month or, by hitting the button on the sidebar.

Here are the pictures of Lauren and I making the bread - you will see how easy it is!

This is what you will need for the recipe:

In a large storage container (one that is not airtight-

I used a large plastic storage container at Laurens),


Measure the yeast


Place the yeast into the large container

Measure the warm water -it should be about 100-110 degrees
(it should feel warm on the wrist, but not burning)

add the warm water

measure the Kosher salt

add the salt to the yeast mix in the container

Measure the flour


Carefully level off the top with a knife or scoop
be sure not to pack the flour down, just level it

add the flour


and mix with a wooden spoon or a mixer with a dough hook
You really just need a spoon,

and stir until all the flour is incorporated

Don't knead, it isn't necessary
You're finished when everything is uniformly moist,
without dry patches
It takes a few minutes, and will yield a dough that is wet
and loose enough to conform to the shape of its container.

Allow to rise on your counter at room temperature for at least 2-3 hours.
Cover with lid (not airtight or it could explode the lid off).
Allow the mixture to rise at room temperature until it begins to collapse
(or at least flattens on the top), approx 2 hours, depending on
room temperature, and initial water temperature
(longer rising times, up to 5 hours, won't harm the result.)


This is how the dough will look as it's rising on your counter


You can use a portion of the dough any time after this period,
but it is better to refrigerate the dough for use the next day.
Fully refrigerated dough is less sticky and easier to work
with than dough at room temperature.

Put the dough into the refrigerator overnight

When you are ready to use the dough,
figure you will need 45 minutes to 1 hour
to let the dough rise on the counter,
at least 20 minutes for your pizza stone to heat,
35 minutes to bake the bread,
and about 25 minutes to let it cool so you can cut it.


Baking Day:
Turn your oven to 450 degrees
with your pizza stone on the middle rack, and an
empty baking pan on the bottom of the oven


Take your pizza peel
(I use a wooden one at home)

and sprinkle it very liberally with cornmeal


Remove the dough from the refrigerator

Remove the cover, this is what the dough looks like

Sprinkle top with a small dusting of flour

Pull up a grapefruit size ball of dough
(Put the rest of the dough back in the refrigerator
when you are done shaping the ball, it will
keep for up to 14 days)

Gently pull it under to form a ball

Place on the pizza peel and let it rise

see how much it grows as it sits on the counter


While the dough is rising, I put a very sharp knife
a measuring cup, and flour on the counter -
you will need these as you get ready to bake the bread

Let the water run so it is very hot

Fill a pyrex measuring cup with the hot water

Place it on the stove or near the stove so you can get to it quickly

The dough has risen at room temperature for 1 hour
and it's ready to go into the oven

Sprinkle the top with a little flour

Take a sharp knife and make some
slits in the dough
(you can do a tic-tac-toe shape or a
series of cuts - the book shows several)

I like to center my knife at the back and come down on
an angle to make a starburst type shape


You don't need to cut very deeply

Ready for the oven

Shake it off the peel
(if it sticks, run a knife under it -
if the shape changes a little it's fine
(one of the loaves shown at the beginning was
my first loaf on my new peel and it stuck
so the loaf was a little elongated -
it still tasted delicious!)
This peel was new too, so it stuck a little as well

Safely on the stone :)

Quickly throw in the cup of water to the baking pan
on the bottom and close the door

30-35 minutes later depending on your oven delicious bread!

Let cool on a rack for about 20 minutes
if you can resist the aroma,
it makes it easier to cut

Enjoy!!

Note: All the loaves shown here were made by me using this recipe. I make mine a little larger than the directions say, so I usually get three loaves to a batch. This is the best recipe.

Do not leave this page without ordering the book, your taste buds, stomach, and your family will thank me :)